Corded Bay Window Curtain Tracks – Smooth, Child-Safe, Made to Measure
Got heavy or tall curtains? A corded track makes opening a breeze. We make each one to fit your bay perfectly and meet UK safety regs
✅ Effortless pull-cord operation
✅
Meets EN13120 child-safety standard
✅
Handles blackout & heavy fabrics
✅ 10-Year guarantee included

✅ 10-Year Guarantee
Built to last, parts & workmanship
✅ Expert Support
Real help before & after you order
✅ Bay Bends Included
Price based on overall width only
✅ Free UK Delivery
Usually within a week
🎥 See the Track in Action
Watch how smoothly our corded bay tracks glide — and how easily they install (no bending, no cutting, no fuss).
👉 Take the Video Tour ➜
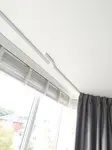
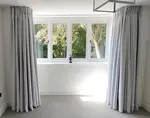
Why Choose a Corded Curtain Track for Your Bay Window?
✔️ Easy Operation – No tugging or dragging. Open and close your curtains smoothly using a neat side cord.
✔️ Perfect for Heavy Curtains – The corded mechanism handles larger curtain weights with ease.
✔️ Protect Your Curtains – Keeps hands off delicate fabrics (especially white sheers).
✔️ Made to Measure – Just send us a photo and a few rough sizes. We’ll do the rest.
✔️ Delivered Pre-Bent & Ready to Fit – No DIY bending or guesswork needed.
✔️ Full Support Videos & Guidance – We walk you through every step, from measuring to fitting.
✔️ 10-Year Guarantee – If it doesn’t fit, we’ll remake it. Simple as that.

🚫 Better Than DIY Bendable Tracks
|
Feature |
Ezecurtains Corded Track |
DIY Bendable Track |
|
Cord operation |
✅ Yes |
❌ No |
|
Pre-shaped to your bay? |
✅ Yes |
❌ You bend it yourself |
|
Glides smoothly? |
✅ Yes |
⚠️ Often jerky or stiff |
|
Support for heavy curtains? |
✅ Yes |
⚠️ Not recommended |
|
Help with measuring? |
✅ Personal guidance |
❌ You're on your own |
|
Fit guarantee? |
✅ Yes (10 years) |
❌ No |
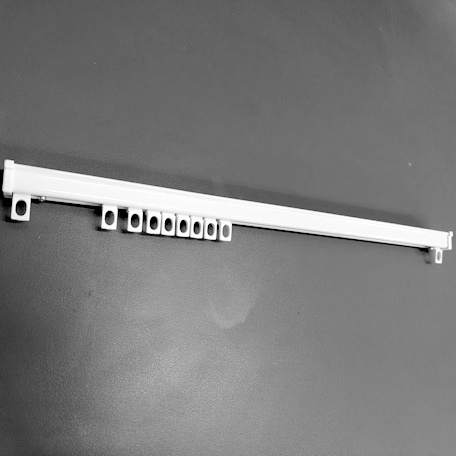
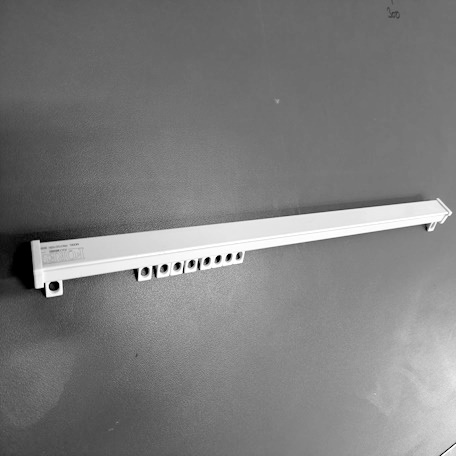
📦 What You’ll Receive
- A fully assembled corded bay curtain track
- Pre-shaped to your exact bay
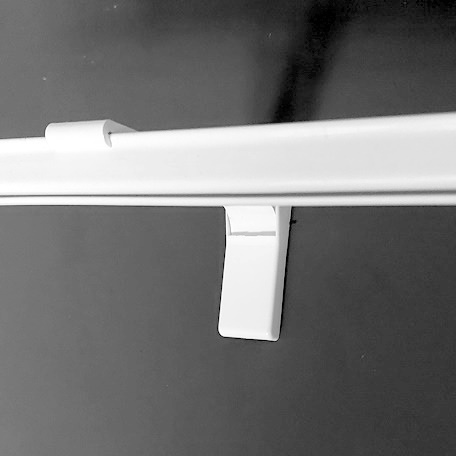
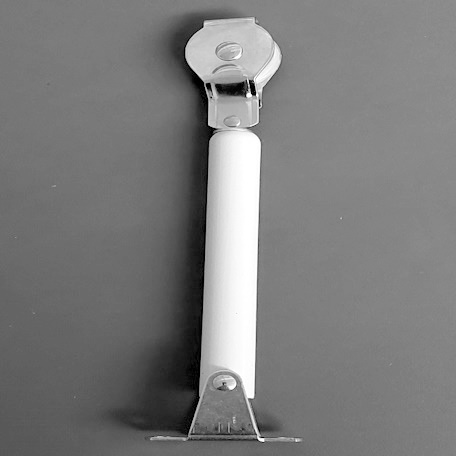
- All brackets and fittings included (bracket approx. every 30cm)
- 20 gliders per metre of track
- Cord mechanism fitted and tested
- Full fitting video and support
- Our 10-year guarantee
All delivered in a strong, protective box — ready to go.
🎛 “📏 How to Order – It’s Simple (Even If You’ve Never Done This Before)”
Ordering your corded bay window track is straightforward – and you don’t need to be a DIY whizz.
Here’s what to do:
- Decide if you want the track to run just within your bay, or to also include returns (flat wall sections at each end)
- Take a front-on photo of your bay showing the full sill
- Measure roughly around the bay (including returns if needed)
- Use the instant calculator for a quick price
- Once you order, we’ll send you a full measuring guide and clear instructions on choosing your cord position (left or right)
We’ll check over everything and let you know if anything looks off. You're never left to guess 😊
🧵 “📏 Corded Track Details at a Glance”
Here’s a quick overview of your custom-made corded track:
- Operation: Cord-drawn (choose left or right side)
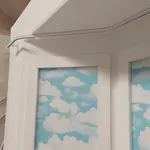
- Material: White powder-coated aluminium
- Brackets: Nylon, spaced approx. every 30cm
- Gliders: 20 per metre of track (UV-stabilised)
- Track profile: 15mm deep × 20mm wide
- Cord drop: made to finish 150cm up from the floor (makes child safe)
- Optional: Overlap arm for centre-closing curtains
Strong, smooth, and built to last – we’ve used these same tracks in trade jobs for years.
🚚 “Quick Delivery + Peace of Mind”
Fast, Free UK Delivery
Your corded bay track is made to measure and normally arrives within 7 to 10 days, ready to fit.
Built-In Confidence
You’re covered by our 10-year guarantee and you’ll get personal help and support if you need it at any point – before or after you buy.
We’re always just an email away if you’ve got a question 👍
💬 Real Customers, Real Feedback
“It was a nightmare trying to open our heavy curtains before. Now we just pull the cord and they glide across beautifully.”
— Angela, Nottingham
“I wasn’t sure how the cord system would work, but Lee explained it all clearly. The fitting video made it simple and now it looks amazing.”
— Marcus, Birmingham
“Our bay window is a tricky shape but the track fits perfectly. Love the corded option — no more pulling on fabric.”
— Sarah, Manchester
Read more reviews
Corded Bay Track FAQs
Yes — we’ll ask you during the order process. Just choose the side that’s most convenient for you and your room layout.
Absolutely. We’ll check your order details and your bay window photos to make sure you get the right brackets for a smooth and simple install.
Yes — perfect for pencil pleat, pinch pleat, and wave heading curtains (if you choose the wave version).
Yes — all our corded tracks come with child safety tensioners and full fitting guidance to meet UK regulations.
Still unsure about something?
Just send us a quick message or photo of your window — we’ll be happy to help you decide if this corded track is right for you.
✅ Ready to Get Started?
If you want a smarter, smoother way to control your bay curtains — you’re in the right place.
👉 [Get Your Instant Price ➜]
Still have questions? Just send a photo and we’ll guide you.
Ezecurtains – Helping UK homes fit high-quality curtain tracks for awkward bays since 2010. No stress. No sales fluff. Just good advice and a great product.
Not sure what bay shape you have? 👉 [ Then check out the bay window styles with pictures ]
Corded Bay Track Calculator
Need some help?
Not sure how to complete this form above to get a price for your bay. Then watch the help video just above the calculator.
Any problems using this form then please just ask the 24/7 Help Assistant in the bottom right of your screen. You will get an instant answer any day or time. Still not finding the answer!
Then send us a message here (with a photo) and we will get back to you within 24 hours. Or call call us on 0800 246 5091 between 9am til 6pm (Mon to Sat).
Be aware we currently only deliver to the United Kingdom.
- Home
- Corded bay tracks
You might like these
Bay Window Curtain Tracks – Custom Made to Fit | EZECurtains
Custom-made curtain tracks for any bay window shape. Strong, smooth-gliding, and easy to fit. Watch our video demo and get your instant price today.
Slimline Bay Window Curtain Tracks – Custom Made to Fit Your Bay
Strong, slimline curtain tracks for bay windows. Made to measure, easy to install, and guaranteed to fit. Quick UK delivery. No cutting or bending needed!
how to order a bay track
You have no need to worry about how to order a bay track with us. It's a very simple process placing your order on the website. We can also help you if you get stuck at anytime. We know most people have never done this before and don't really know where to start.